In this lesson, we took a first look at the work European Scientists are doing every day. It was the first in a three part lesson series on the work of scientists. As you can imagine, this was a particularly difficult one to try and translate into the world of ‘digital distance learning’! I decided to dip my toe into a brand new methodology for me. I have long been a lover of escape rooms in the real world. I’m the proud ‘escaper’ of over 25 escape rooms across the Europe! I always kept a close eye on the world of ‘educational breakout rooms’, but just never had the time or dedication to sit down and design one for myself. Daunted by the task ahead of me, like so many others in a similar situation, I headed off the Teachers Pay Teachers for some inspiration. There I found the perfect starter ‘digital escape room’ pack. After a bit of tweaking and some very dodgey voice acting, I was on my way!
The Lesson
Methodology:
–W.A.L.T: Share the learning objective of the lesson with the group.
–Assessing Prior Knowledge: How do you think scientists could help with solving crimes?
–Direct Teaching: Explain what a forensic scientist does. Explain the skills that they would need. Then explain the role of a forensic scientist in DNA testing, substance testing and fingerprinting.
–Fingerprint Collecting: Collect and examine their own fingerprints or the fingerprints of others. Colour in a square of heavy pencil on paper. Rub finger on the square. Press finger onto the sticky side of some tape. Stick the tape onto some white paper. Check to see if you can see any fingerprint patterns.
–Escape Room Briefing: Watch the video that sets the scene for the first escape room challenge. Print off or have available the escape room booklet with the challenge in it.
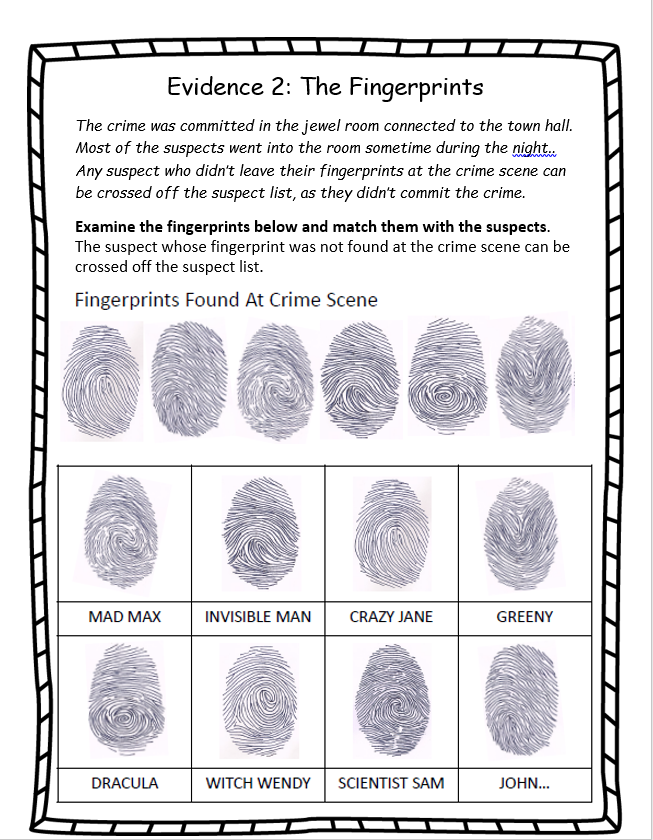
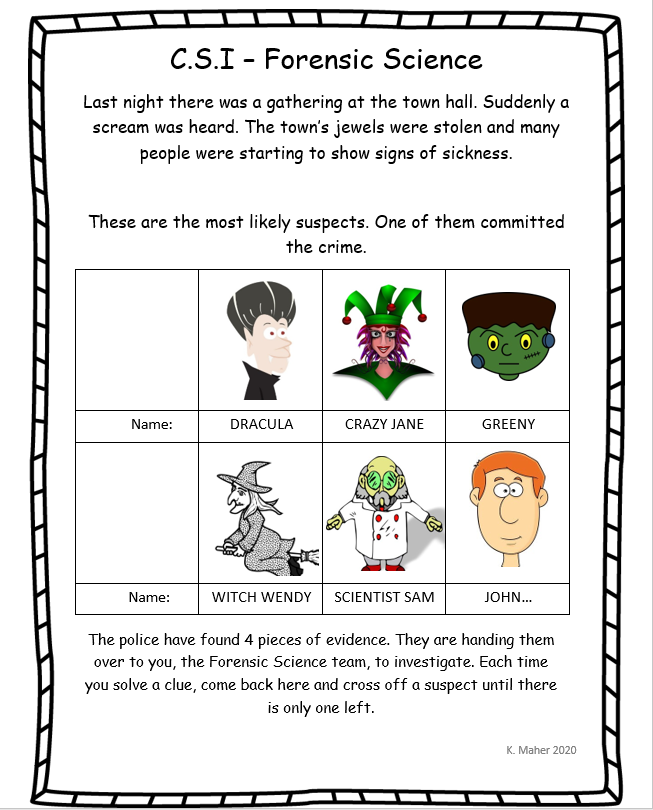
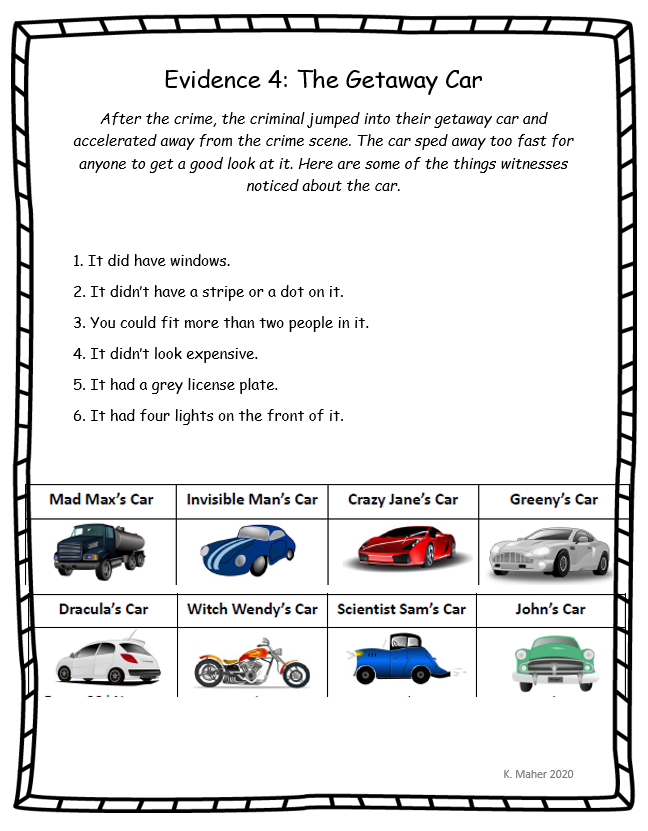
–Forensics Escape Challenge: Working through the booklet of ‘evidence’, the children have to figure out which one of the suspects committed the crime. Each piece of evidence will eliminate one or two suspects each time. By the end there will be only one remaining.
How Did It Go?
Well… Let’s just say this one was a learning curve! As much as we teacher try, you never can quite identity all the hiccups before they happen can you! I had to adapt the Escape Challenge that I bought on Teachers Pay Teachers quite heavily from the get-go. To be honest, one of the original challenges had me stumped for a good 10 minutes. Not that my logic skills are much better than a 12 year old anyway! One of the ‘simplified’ evidence challenges is down below. I don’t mean to be negative, because overall the lesson was actually excellent! The methodology was something the children had never experienced before so it was filled with excitement! Nearly everyone who took the challenge managed to find the criminal in the end too.
Now that I understand how the flow of the ‘digital escape room’ works, I am feeling confident enough to give it a whirl myself next lesson. I’ll have to do a bit more research on the actual set up of it. If possible., I would much rather not have to rely on ‘worksheets’ to work with but we’ll see how it goes! Wish me luck…
What would I change?
I definitely want to start experimenting with moving the ‘challenges’ and worksheets towards the digital realm. I am super grateful to the TpT seller for inspiring me to start exploring the ‘digital escape room’ methodology! I am going to research how Google Forms and Google Drive could be used to ‘automate’ the challenges a bit more, so that the children can move through challenges at their own pace. Other than that, a pretty good lesson!